
This week was very short, but we did a lot of work!
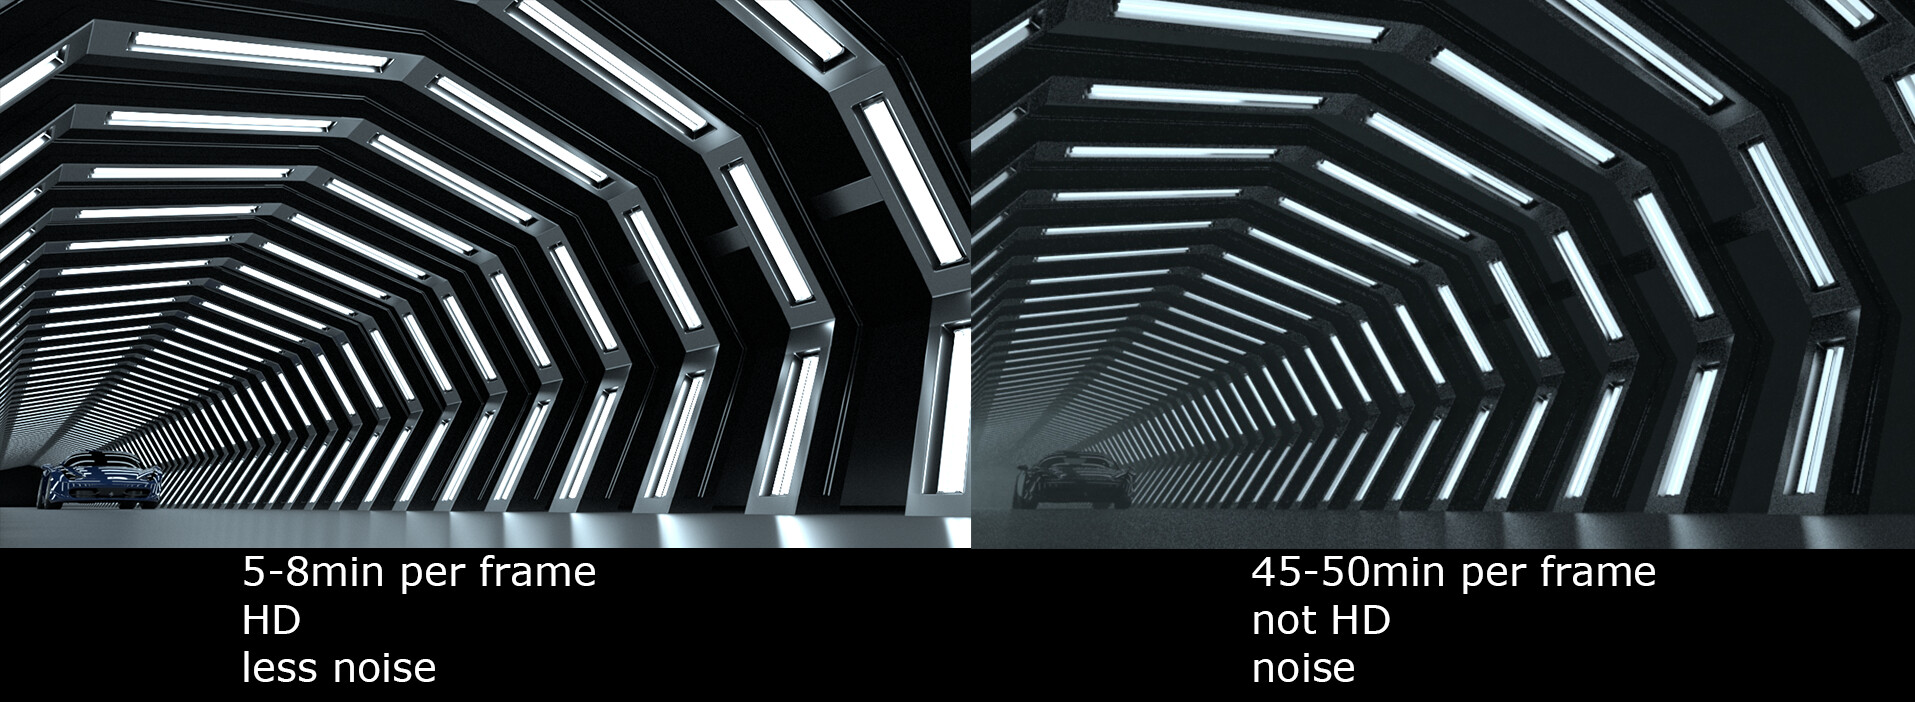
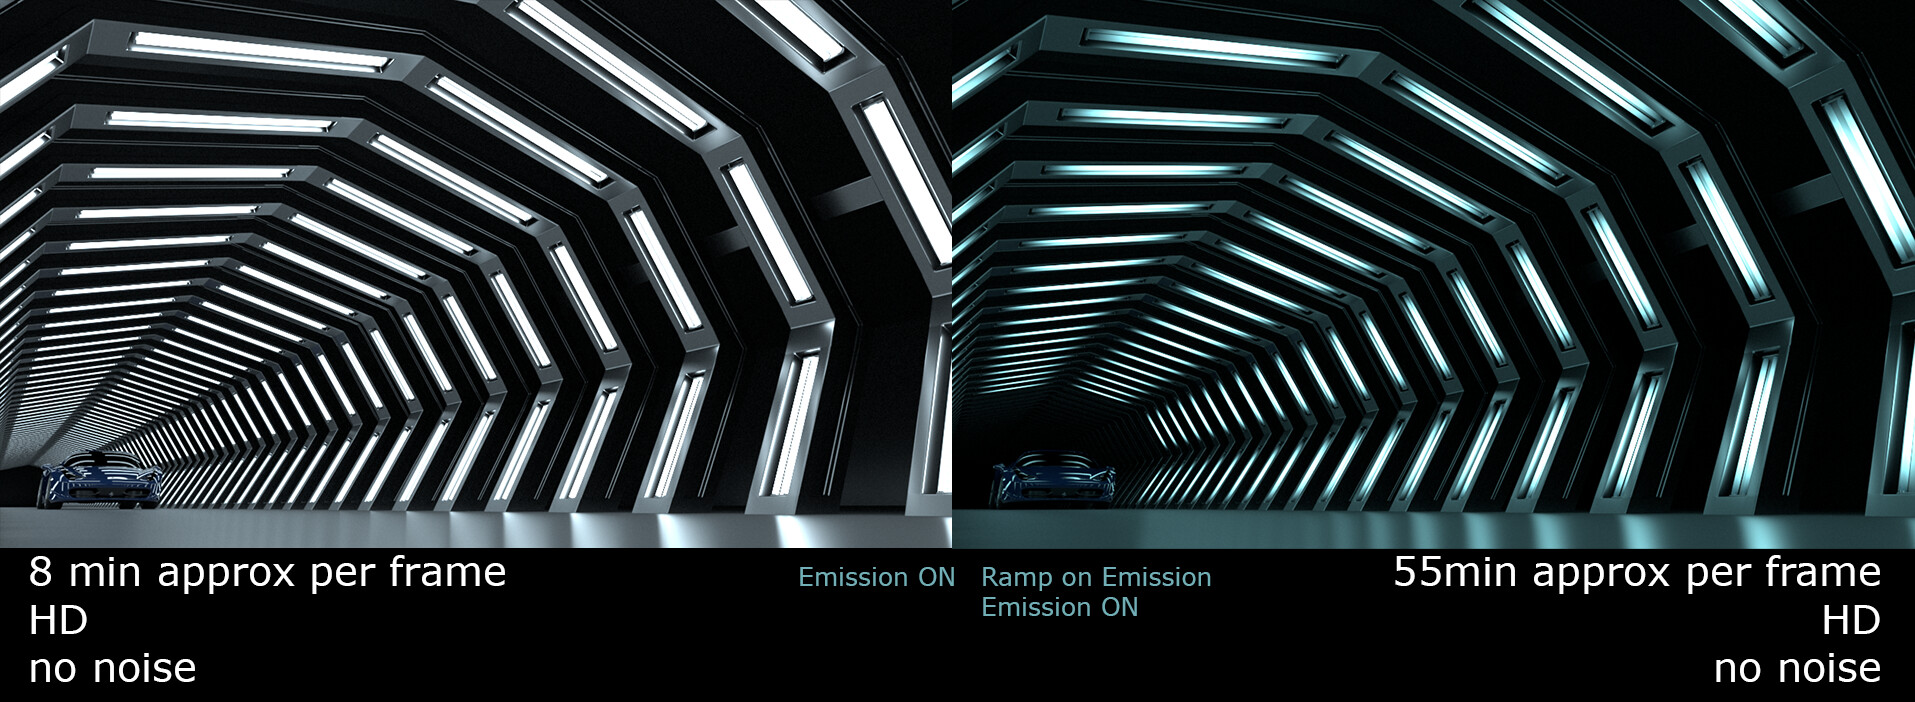
I was working on refining the lights for shot 1. Last week, I was using area lights with 2 cylinders with emission per hole, and a spotlight by the end of the tunnel. This week, I worked only with emission and the far away spotlight. The render time results were AMAZING. I have been testing different ways to optimize our scene due to the amount of lights.
The image on the left is from this weekend, only emission. The image on the right is from last weekend, area lights and emission.
- Lights Animation -
Yanni created a script for me, so I could animate the emission of all these lights (like 600+ cylinders with emission). Imagine keyframing all that :( yay YANNI!!! Because I created one shader for all the lights, I only need to animate the emission. Her script creates a tool on the shelf that allows me to drag select in the viewport, and when I click her button, it deselects everything that's not a light. It also creates a MtoA Emission Material Override.
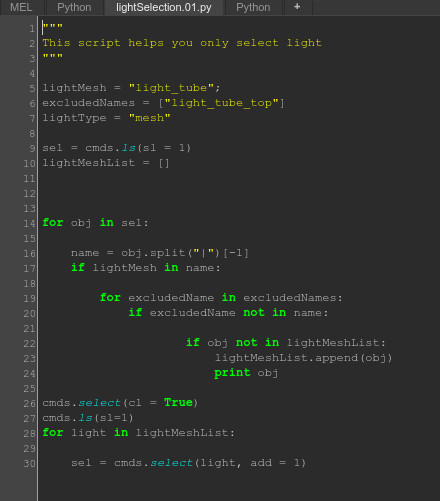
With her script, I'm able to select the lights of a whole row and turn the emission OFF, helping me keyframe less (like 50 times instead of 600!!). I did a test render of 10 frames. As the car passes by the tunnel, the lights turn off. The animation made it look like the car was not moving at all, so I need to change up the way the lights turn on/off.
Here's the video of the 10 frames test of animated lights:
https://vimeo.com/387324177
Password: TheMill
I'm thinking of animating the lights turning on instead of turning off. If we can change the camera time and add 48 frames in the beginning of the car turning on its engine, the lights can turn on in a cool way. In this clip from The Incredibles, go to the second 19 of the video to see one idea:
Here's another example of ideas for the lights turning on:
- Light Colors -
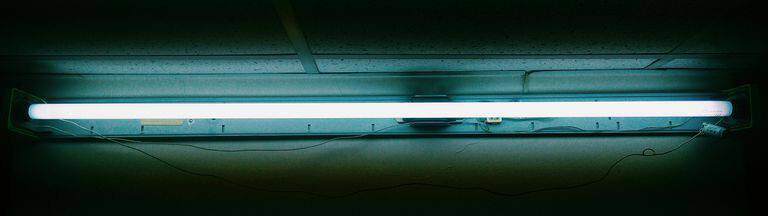
After I tried, the animation, I realized the lights look very CG, comparing it to the test renders from last weekend with area lights. The area lights were giving it a gradient look, while with only emission it looks too white and CG. Thinking of a solution, I decided to create an emission map, so I can control where more light passes through. I looked at reference of a fluorescent light tube: https://www.thoughtco.com/fluorescent-light-science-experiment-604157
I realized that my cylinders didn't have proper UVs, so I UVed one, and found a script from Nestor Prado to transfer its attributes to the hundreds of cylinders I have in the scene:
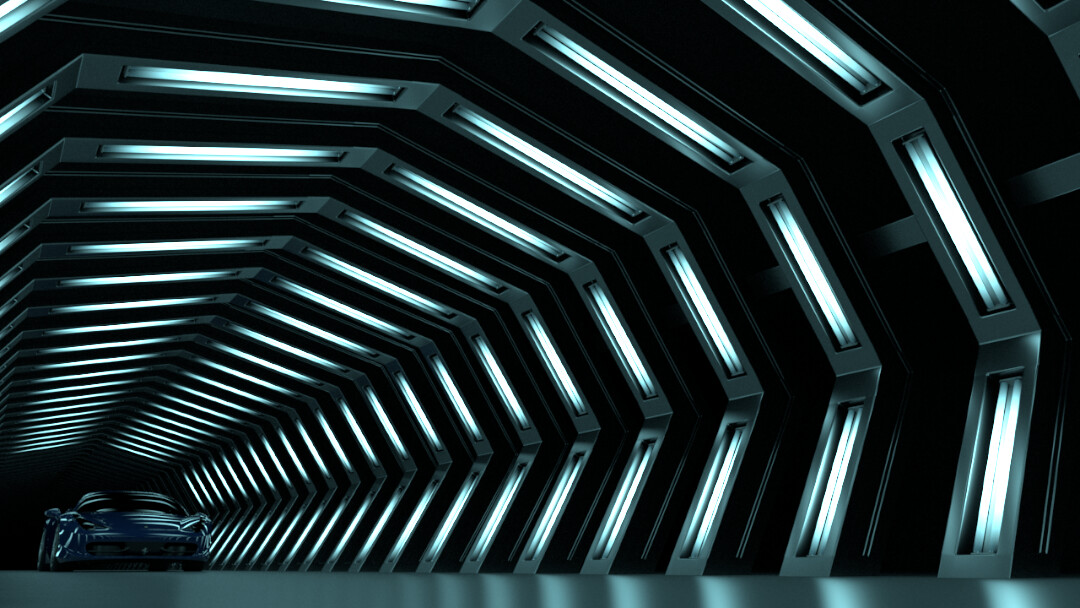
I changed the color of the emission to more blue-ish. That way, it also helps to transition to shot 2 with Mitch's portal and its blue colors. I used a procedural ramp from Maya to create the emission map. The ColorConstant node controls the amount of emission the lights have.

I really like the final result of adding the ramp, because it enhances the look of the emission lights, without using area lights, since I cannot afford them right now :D The new renders, HD with high samples to reduce noise, take approx 55min per frame. That's great compared to the area lights with noise not HD!!
- Final Render (for now) -
complete rendered sequence test for shot 1: https://vimeo.com/387345992
Password: TheMill
- Render Comparisons -
emission vs area lights and emission

I rendered a 360 camera of shot 1 for the turntable as well:
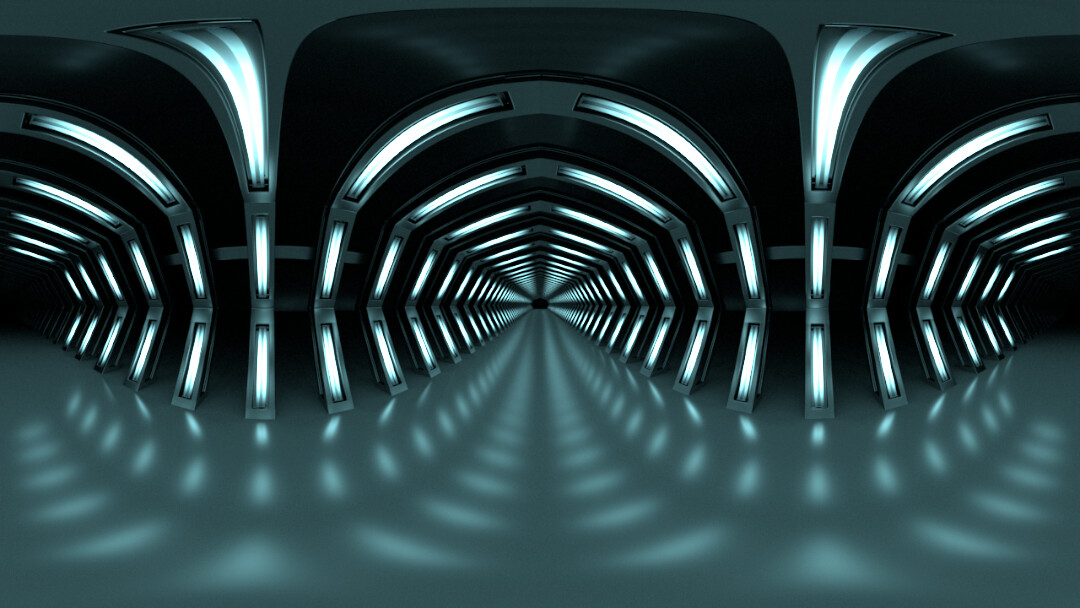
car turntable: https://vimeo.com/387323652
Password: TheMill