
Week 5
Class 09
I watched tutorials on Mari: https://youtube.com/playlist?list=PLfcn6CVBmf7iEHKhAo7zkSEAnjAnT5a4l videos on UI, paint buffer, tools, palettes, projection, nodes and the node graph.
I tried to create my displacements on Mari by projecting some frog/reptile/skin alphas I had, but all the tutorials and documentation I could find were based on the texturingxyz maps and using 3 channels with different displacement levels, while I only had alphas and no texturingxyz maps.
Attempt of my first displacement in Mari, not following the texturingxyz tutorials since I was using alphas:
 Base tileable bump
 Tried projecting a reptile alpha, but it wasn't merging properly with the base tileable bump.
So I decided to use ZBrush instead, knowing that is another approved workflow, and I am familiar with ZBrush. it's not as procedural and non-destructive as Mari, but I am on a deadline here :D. I used alphas, and different intensities to simulate the Mari workflow, where each displacement level has like different "intensities":


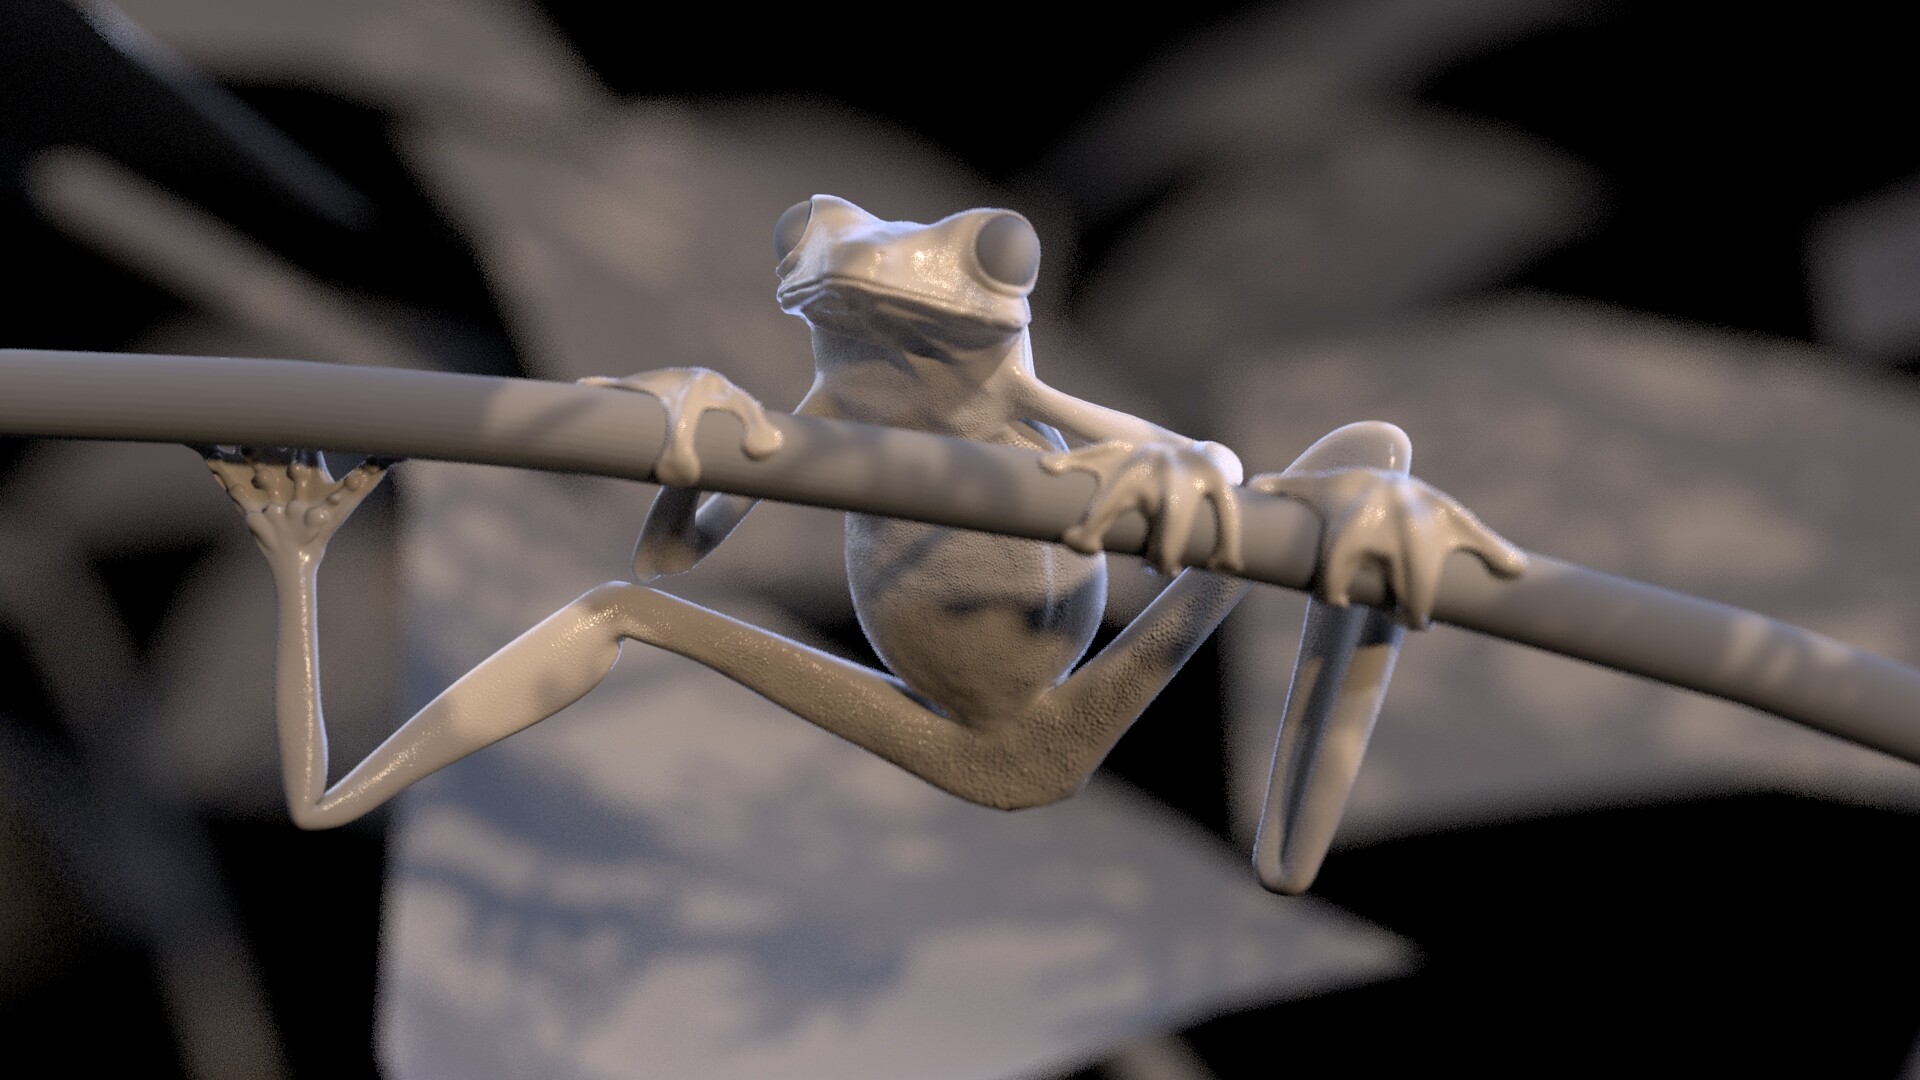 Exported displacements, plugged in Maya Arnold, Attempt no.1
 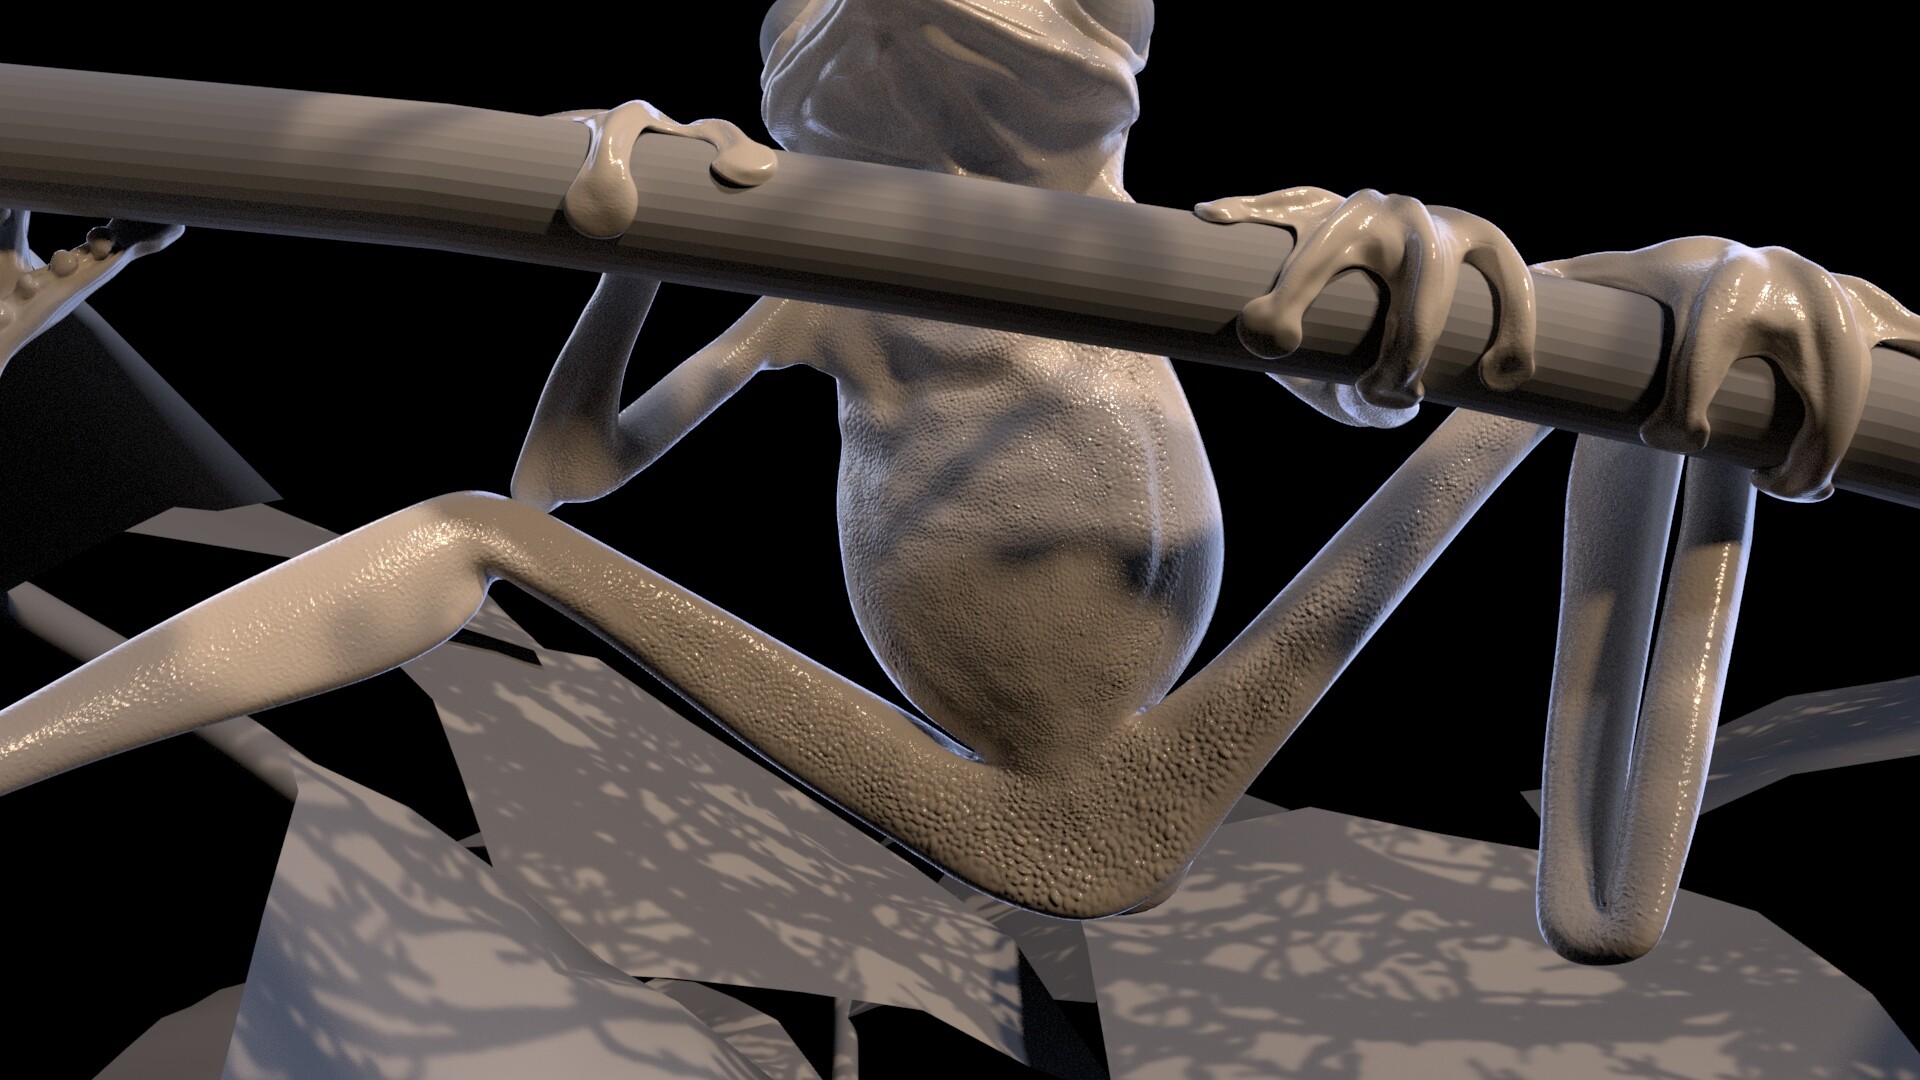 Closeup
Class 10
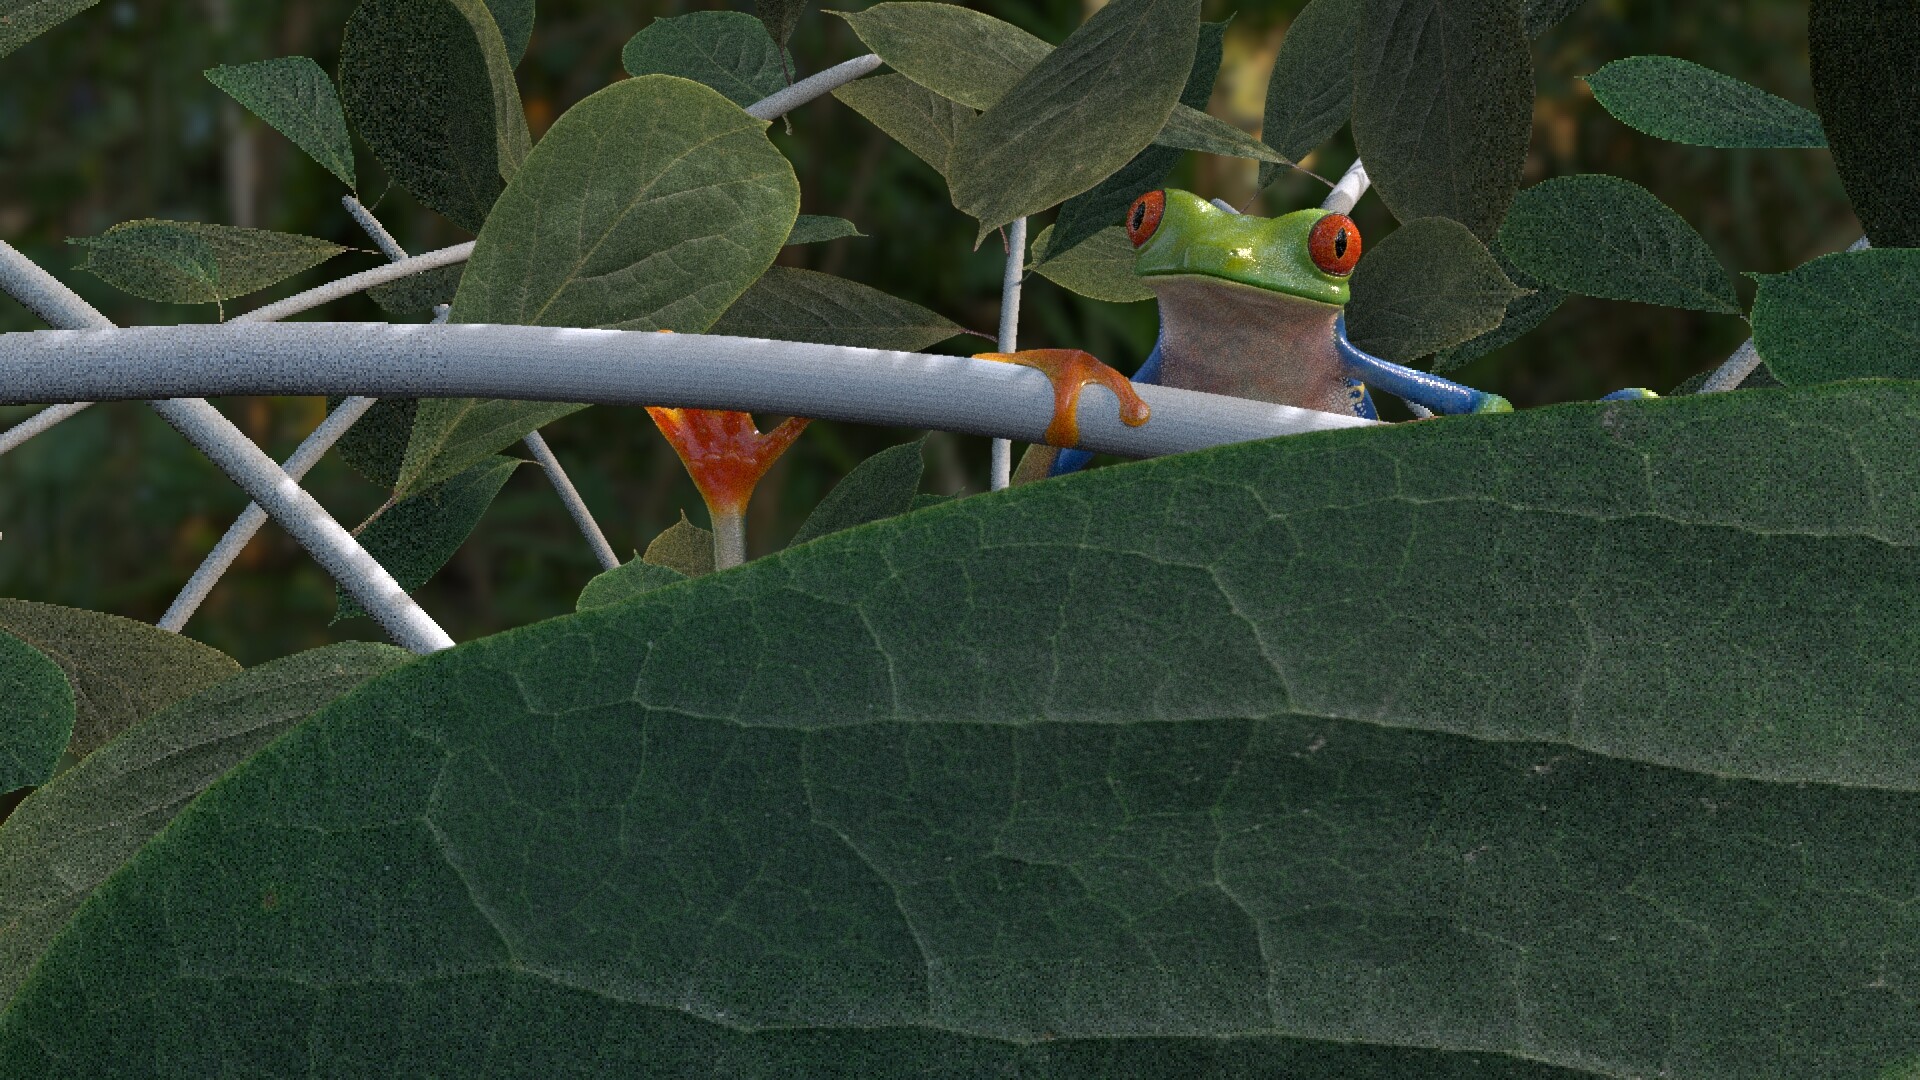
I was able to rework my lighting, following some references. I also changed my framing and composition a little bit:

 references for lighting
Camera movement with Zdefocus from nuke:
Week 6
Class 11
I was able to start some base colors on Mari, getting used to the paint buffer tool. My next steps are to finish blocking out the color, and start blending them together. I am trying to work as procedural as possible, by creating masks:

Class 12
After using Mari for a couple of days now, I realized why I was having some of the issues I was encountering. First of all, when creating my Paint nodes, I would not set a color, so whenever I started using it as a paint mask, I would have to use levels later on to make it fully black or white. So by using levels, I would lose the gradients I had done, because of clamping. So I redid all my masks, and started to properly blend more the colors. I still need to continue working on the separation between the blue and white:


I also had to go back and fix my UVs. I realized they were a little stretched, and I believe it was because I had a very very low poly and as I sculpted on top of it and made it more high res, the UVs needed to be unfolded again. I ended up ditching that "lowpoly" and grabbed a higher subdivision as my new low poly. I reprojected my details:
 Old UVs
 Old UVs
 Updated UVs - just needed to get unfolded again. Then, I had to bring it into ZBrush again to reproject my highpoly, to re export my maps (normal, displacement, cavity)
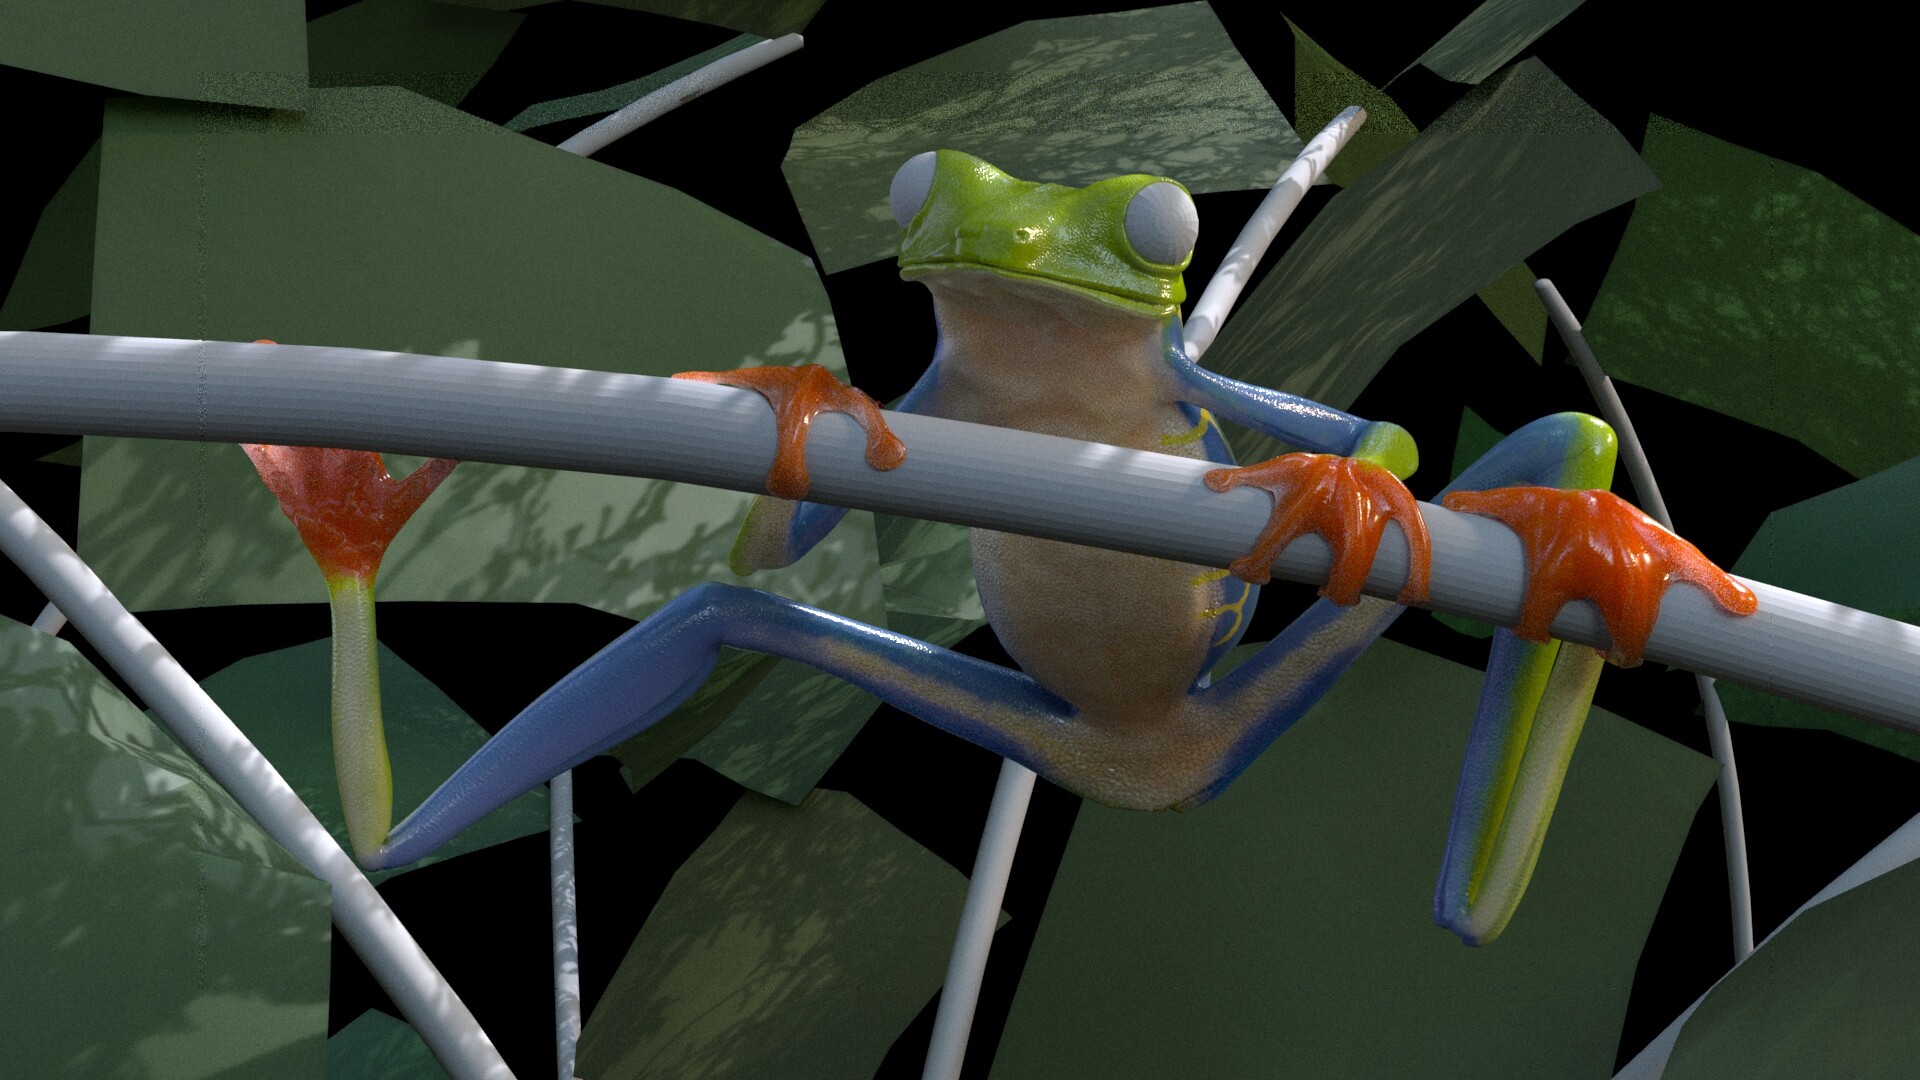
 I also just made a first quick test to check the colors and a fast SSS mask I painted. I am glad I did this test, because I can see I need to be careful with the greens in the background:
Week 7
Class 13
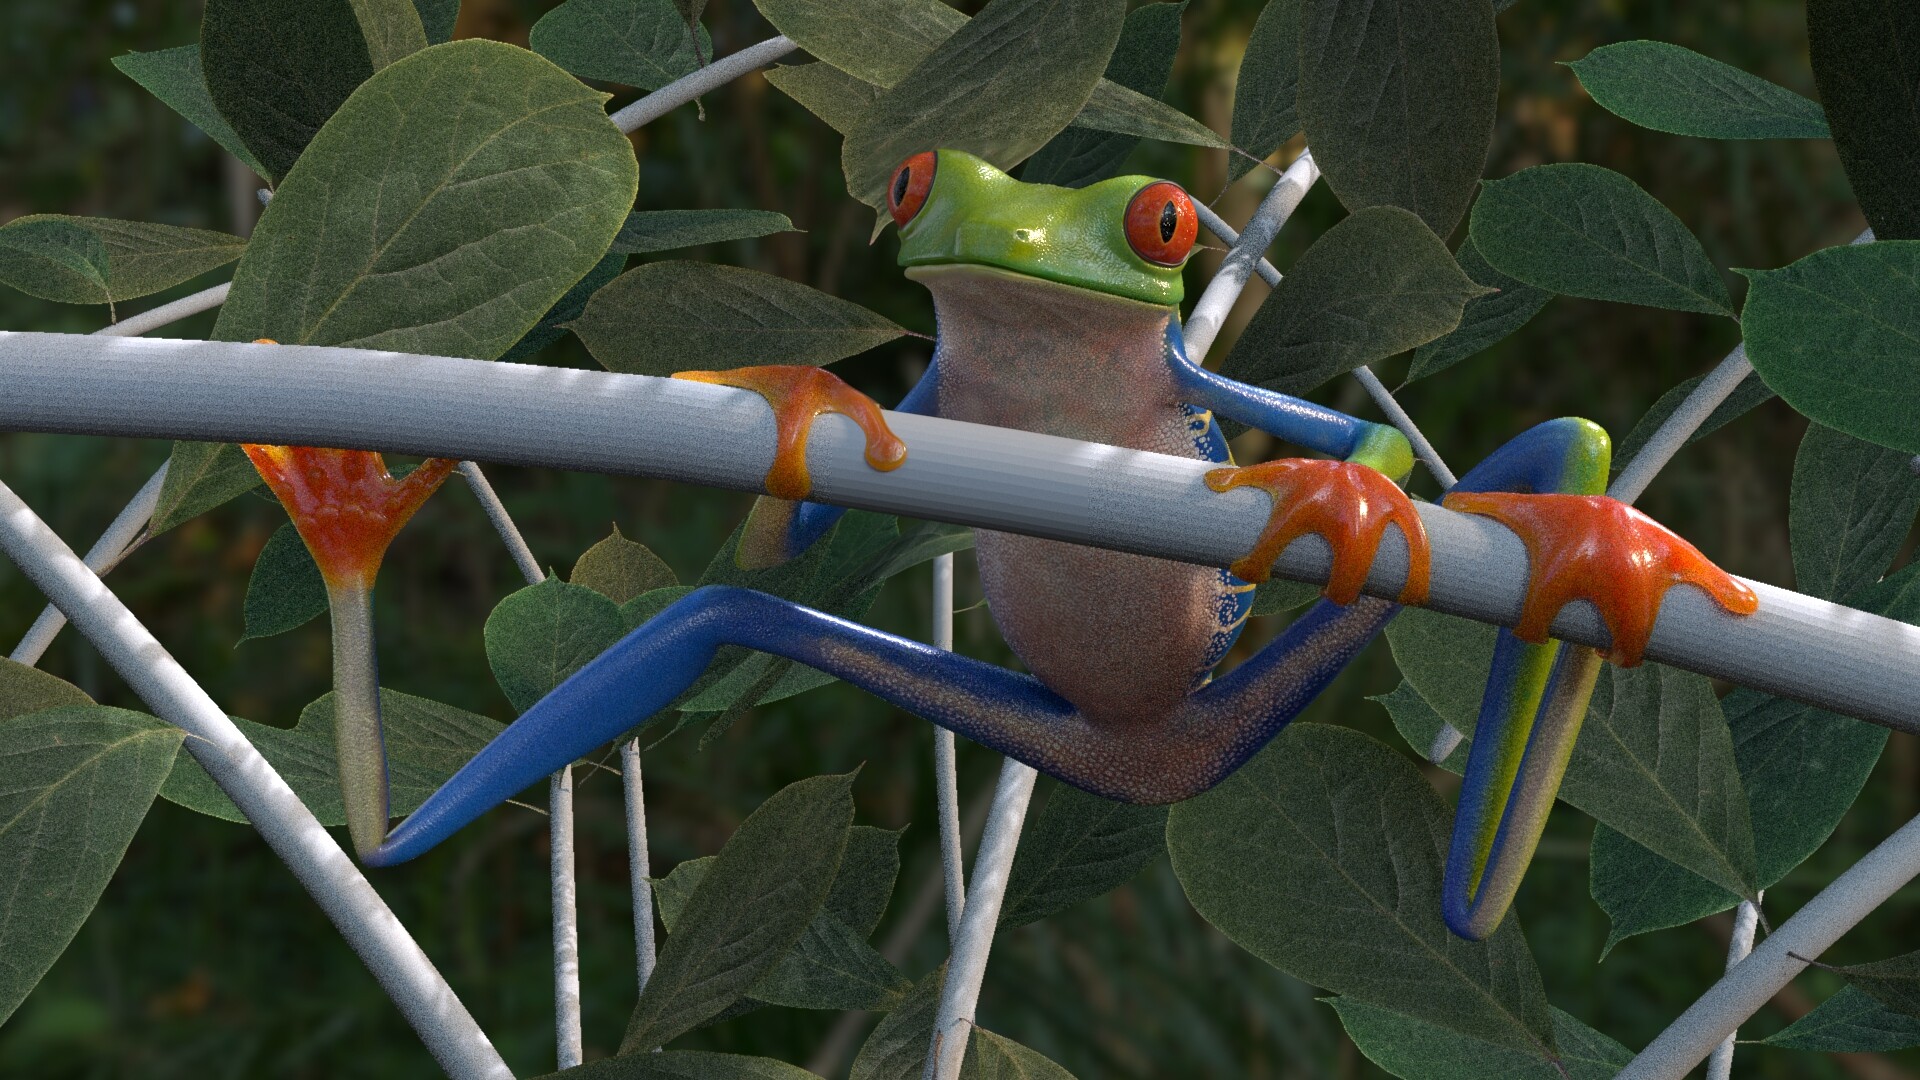
More texture painting detail. I still need to add the purples and pinks on the legs/bottom area, for a SSS color map, and then work on the specular map with the masks I have. I also have to blur/blend a bit more the dark areas of the orange toes:


Class 14
I worked on:
- blending the dark orange with the other orange on the toes
- adding some dark dots on the green part, as well as some blue areas, especially around the mouth and nostrils
- added more purple and salmon color
- made the cavity map a bit darker, since the SSS with the displacement makes the shadows disappear a little beat.
- fixed my masks and node connections

 Nodes so far just for base color / diffuse map
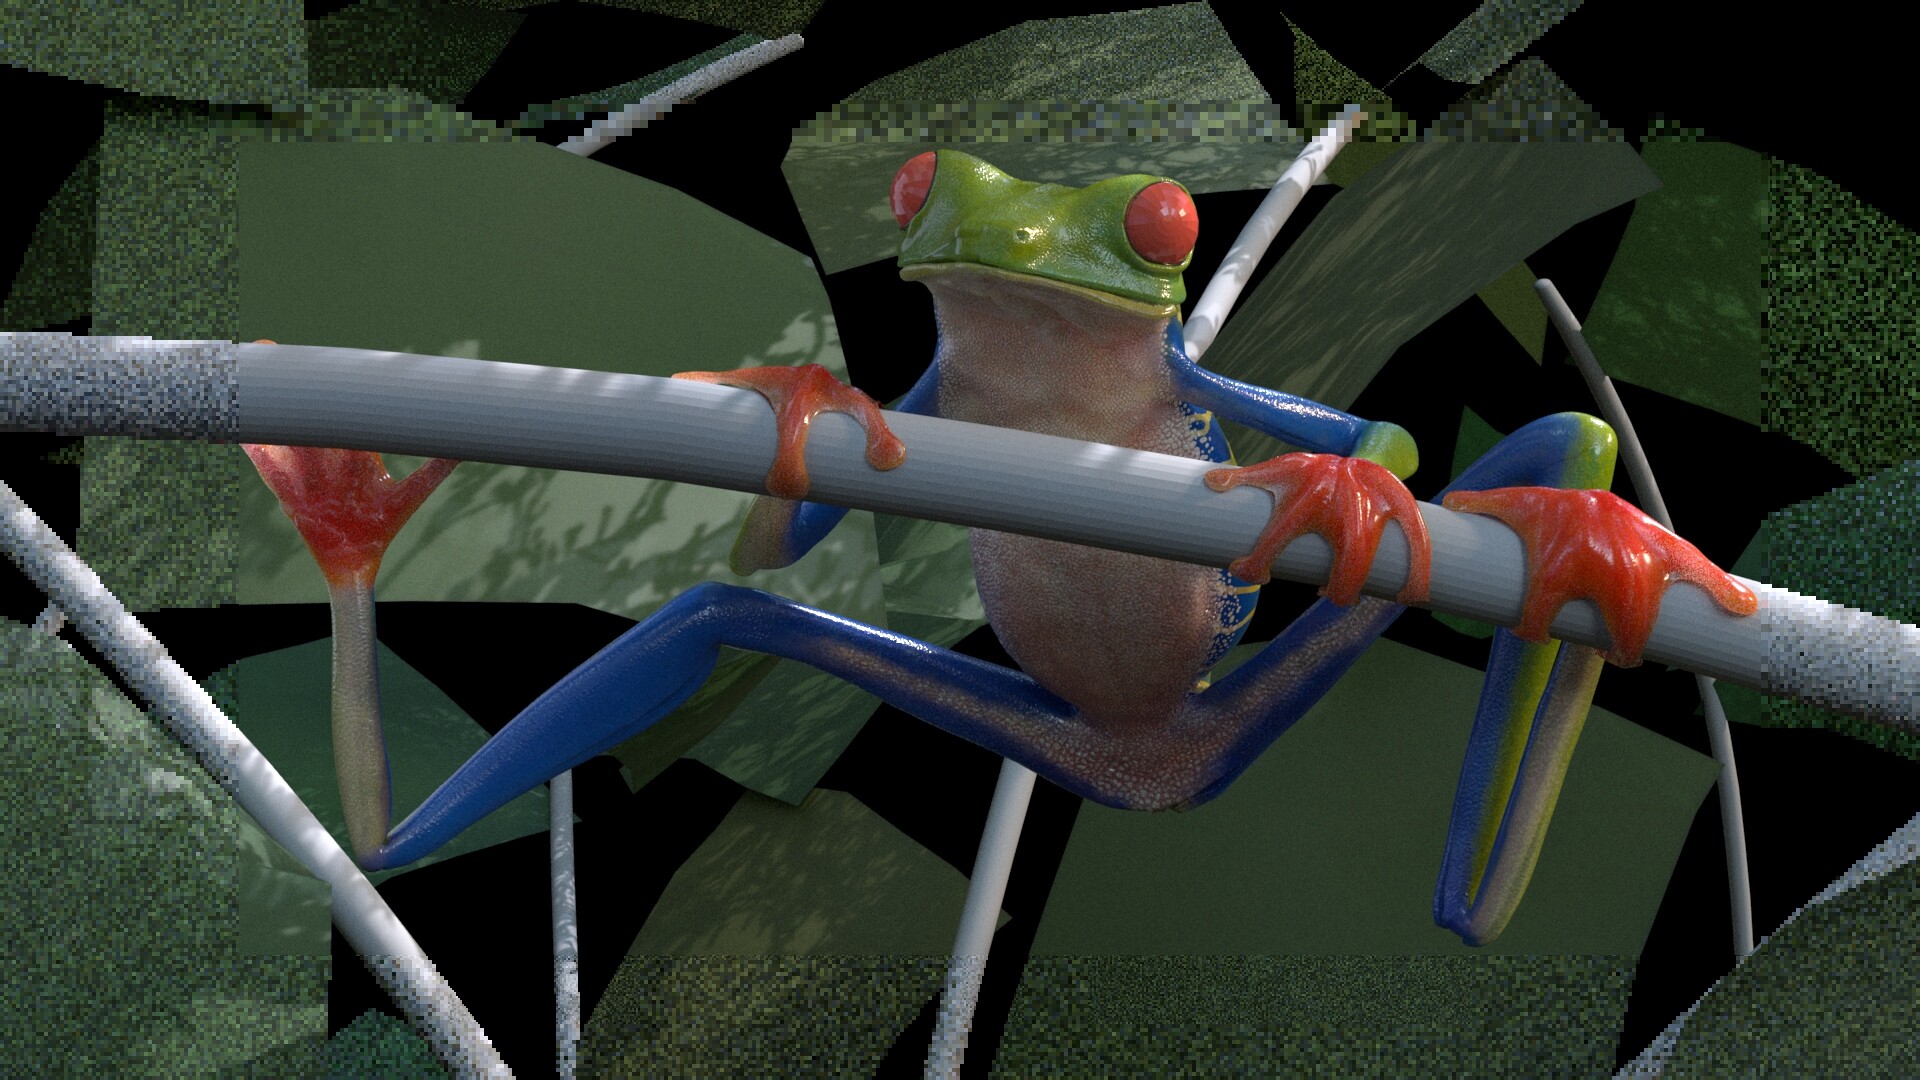
Week 8
Class 15-16
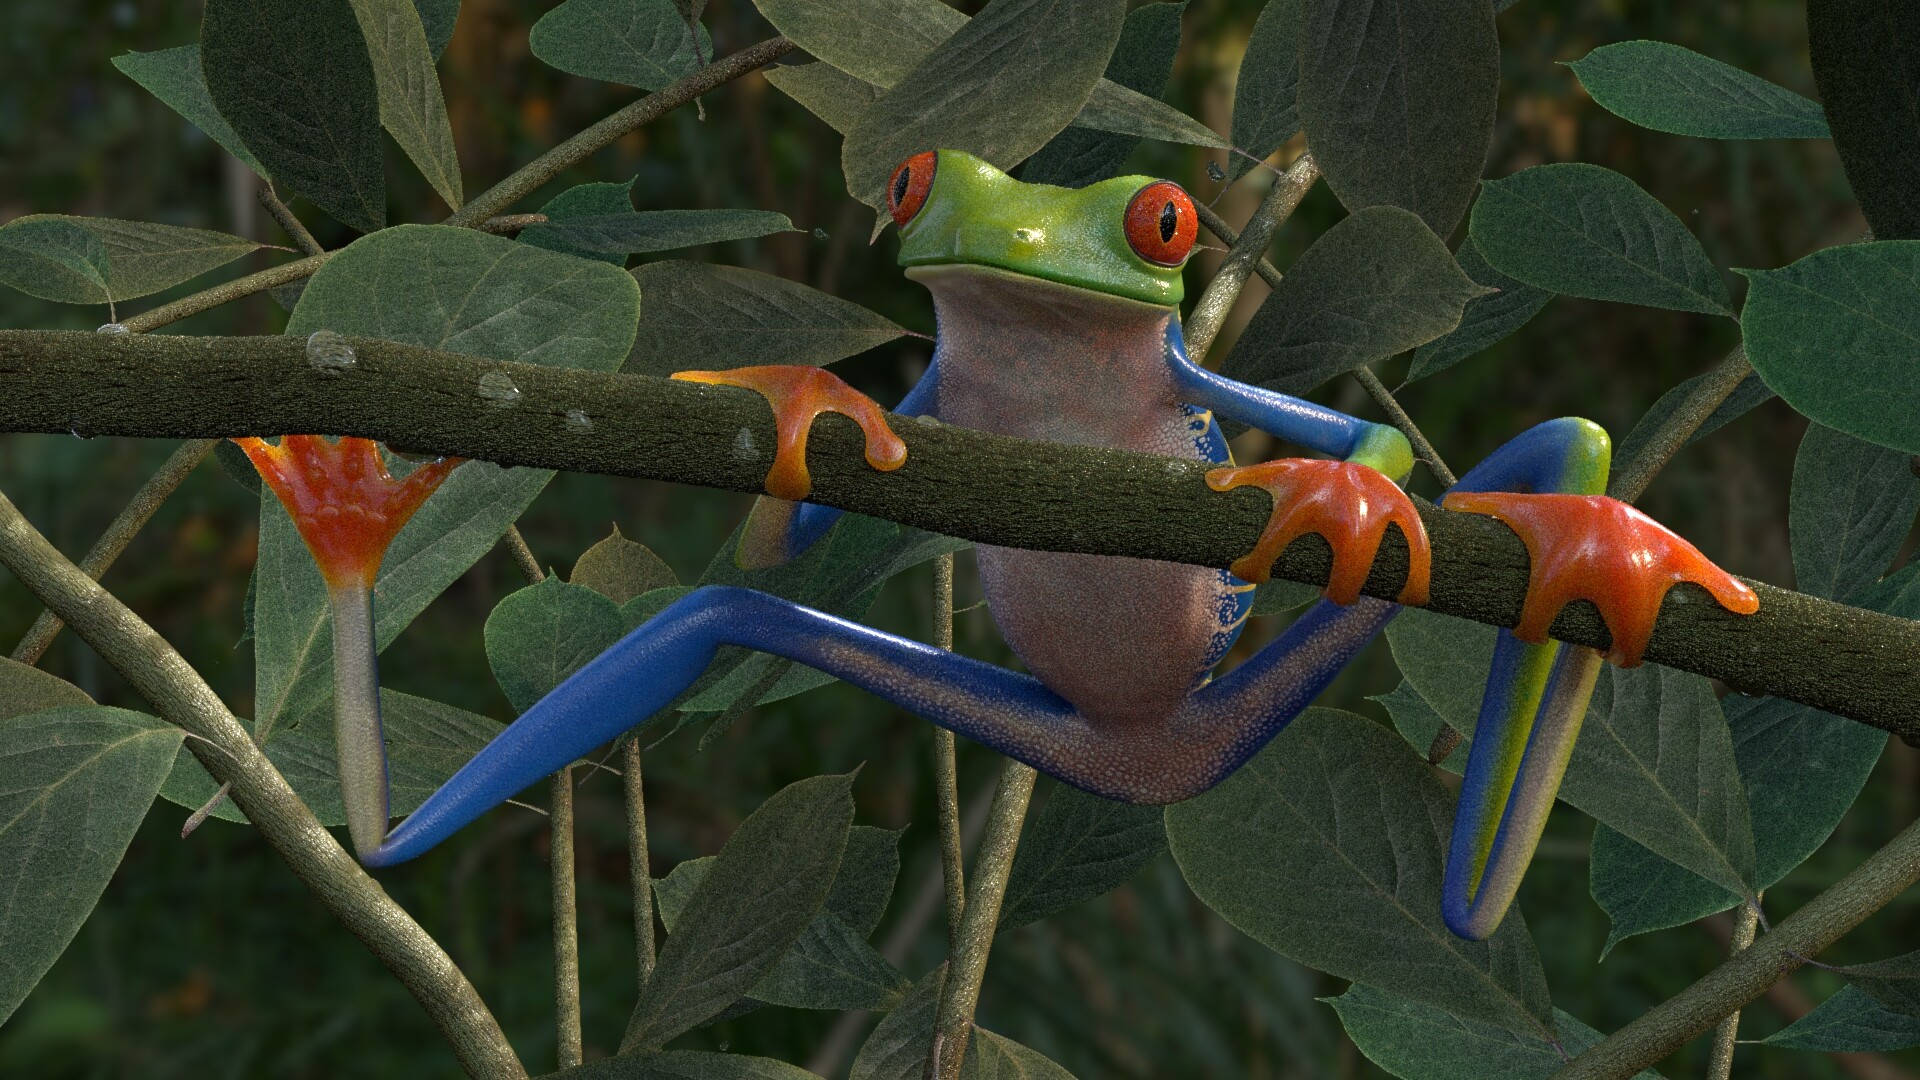
Almost done with the frog maps! Moving on to the eyes and other small fixes:
Week 9
Class 17
Eyes done! I also started the leaves. I scanned a leaf from a tree in my yard, to make it look more realistic. I scanned the leaf, and made the maps and tweaks in Photoshop. I think I can still get rid of an extra highlight or two, in the base color map, as well moves the leaves shape a bit so they don't look too flat/plane shape:
I need to fix the throat and nostril animation as well, and do the stems.
Class 18
I made a Nuke ZDefocus test with the leaves to make sure everything looked nice.


Moved on to texturing and used soft selection to deform a little bit the stems, since I realized they were looking too straight. I tried using a water droplets generator I found online, but I am still playing with it:
Week 10
Class 19
I decided to approach the leaves as mesh with thickness rather than a plane with opacity map, since I felt it was looking too fake. I used the opacity map I had created as an alpha mask in ZBrush, and done! I went in and added thickness to the stem of the leaf as well:


I also animated the gobo and some of the branches, and added a coat layer to the eyes. Now I am just doing the comp to make it prettier, since I am still rendering some frames :)